


How to Get Rid of Skunks
Simple ways to remove skunks and stop future visits around your home.

- Advertisement - Continue Reading Below -
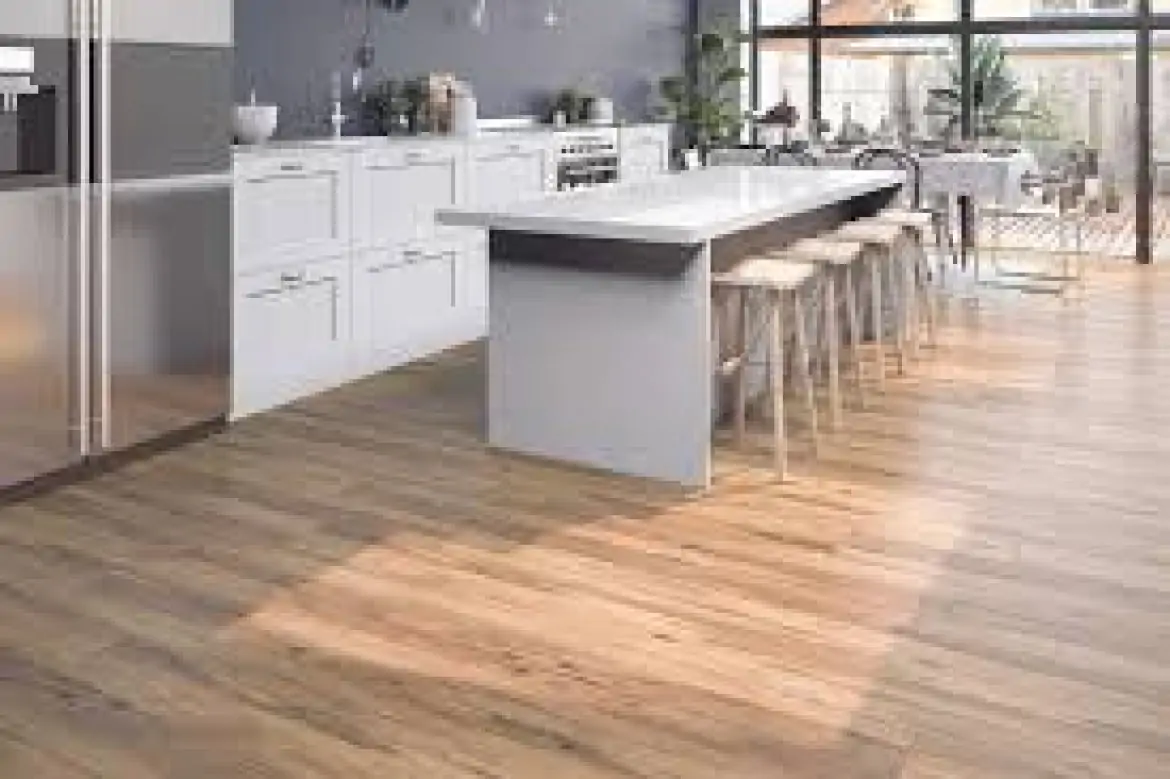
Upgrading to waterproof vinyl plank flooring is a great way to enhance your home. This flooring option is stylish, durable, and easy to maintain. It works well in different areas, including kitchens and bathrooms.
Waterproof vinyl plank flooring is also simple to install. Many homeowners choose it for its practicality and design appeal. The process of upgrading involves several steps.
Proper planning and installation ensure a long-lasting finish. There are many ways to upgrade your flooring effectively. Below are some helpful tips for making the switch.
- Advertisement - Continue Reading Below -
- Advertisement - Continue Reading Below -
Before upgrading, check the condition of your current floors. Remove any old flooring that is damaged or uneven. A smooth and clean surface helps with proper installation.
Look for moisture issues that could cause problems later. Waterproof vinyl plank flooring needs a stable base. If the subfloor is weak, it may need repairs. Fix any cracks or gaps before moving forward.
This step prevents flooring issues in the future. Proper preparation ensures a smooth and lasting upgrade.
- Advertisement - Continue Reading Below -
- Advertisement - Continue Reading Below -
Choose the Right Flooring Style
Waterproof vinyl plank flooring comes in various styles. Pick a design that matches your home's theme. Some options look like real wood, while others resemble stone. Lighter shades make small spaces feel bigger.
Darker tones add warmth and elegance. The right style creates a cohesive look. Consider textured surfaces for added depth. Smooth finishes work well in modern homes. Choose a design that fits your personal taste.
Accurate measurements help in buying the right amount of flooring. Use a tape measure to determine the length and width of each room. Add extra material for cutting and fitting.
Having spare planks helps with future repairs. Proper measurements prevent material shortages. It also avoids unnecessary delays in installation.
Double-check your numbers before purchasing. This step ensures you buy enough flooring. Careful planning saves time and effort.
A clean subfloor is essential for installation. Remove dust, dirt, and debris before laying planks. Use a vacuum or broom to clean thoroughly. Check for moisture and fix any leaks.
Uneven subfloors can lead to problems later. Level out any bumps or dips. Use a leveling compound if necessary. A stable subfloor extends the life of your flooring. Proper preparation ensures a smooth installation process.
Underlayment improves the comfort and durability of your flooring. Some waterproof vinyl plank flooring comes with built-in padding. If not, choose an underlayment that suits your needs.
Some types reduce noise while others add insulation. A good underlayment provides extra cushioning. It also helps with moisture control.
Pick an option that works for your space. A well-chosen underlayment enhances floor performance. It also makes walking more comfortable.
There are different ways to install waterproof vinyl plank flooring. Some options use a click-lock system for easy installation. Others require adhesive for a secure fit. Floating floors do not need glue or nails.
Choose a method that suits your skill level. Click-lock planks are beginner-friendly. Adhesive flooring may need professional help. Each method has its benefits. Pick the right one for your home.
Consider the long-term maintenance of each installation method. Click-lock floors are easy to replace if damaged, while glued-down options provide more stability.
Some installation methods work better in high-moisture areas than others. Researching the pros and cons of each method helps ensure you make the best choice for your home.
Acclimate the Planks
Let the flooring adjust to room conditions before installation. Leave the planks in the space for at least 48 hours. This helps prevent expansion or contraction after installation. Acclimation ensures a better fit.
Temperature and humidity changes can affect the planks. Keeping them in the room helps them settle. Follow manufacturer guidelines for best results. Skipping this step may cause issues later. Proper acclimation improves flooring stability.
Use the Right Tools
Having the right tools makes installation easier. The right tools ensure a smooth installation. Proper equipment makes the process more efficient.
Below are essential tools and their purposes:
Measuring Tape
A measuring tape helps you determine the precise dimensions of the room. Proper measurements ensure you purchase the right amount of flooring and make accurate cuts.
Utility Knife
A sharp utility knife is essential for cutting vinyl planks to fit around edges and obstacles. A high-quality knife makes clean, precise cuts for a seamless look.
Spacers
Spacers help maintain proper expansion gaps between planks and walls. These gaps allow the flooring to expand and contract without damage.
Rubber Mallet
A rubber mallet is useful for locking planks into place without causing damage. It helps secure the planks tightly together for a smooth, gap-free installation.
Tapping Block
A tapping block protects the edges of vinyl planks while securing them into place. It distributes the impact evenly, preventing chipping or cracking.
Knee Pads
Knee pads provide comfort while working on the floor for extended periods. They help prevent strain and discomfort during installation.
Safety Gloves
Safety gloves protect your hands from sharp edges and potential injuries. Wearing gloves ensures a safe and comfortable working process.
Straightedge and Pencil
A straightedge and pencil help mark precise cut lines. This ensures clean cuts and a professional-looking finish.
Pull Bar
A pull bar is useful for closing gaps between planks, especially near walls and tight spaces. It ensures a snug fit for a seamless appearance.
Having the right tools ensures a smooth and efficient installation process. Proper equipment makes the job easier and leads to better results.
Plan the Layout Before Installing
Planning the layout helps avoid mistakes. Start from one corner and work across the room. Stagger the planks for a natural look. Avoid placing small pieces at the edges. Measure and cut planks as needed.
Dry-fit a few rows before attaching them. This step ensures a balanced design. Proper layout planning makes the floor look better. A well-planned floor enhances the room's appearance.
Check for obstacles like vents and doorways and adjust your layout accordingly. Consider how the planks will align with existing room features such as cabinets and walls.
Make sure the final row of planks is not too narrow by adjusting the layout in advance. Proper planning minimizes material waste and ensures a professional finish.
Install the Planks Carefully
Begin installation according to your chosen method. Click-lock planks snap together easily. Adhesive planks require even glue application. Work row by row for consistency.
Leave space around the edges for expansion. Press planks firmly to secure them. Cut around obstacles carefully. Follow manufacturer instructions for best results. Proper installation ensures a lasting finish.
Check for Gaps and Adjust as Needed
After installation, check for gaps between planks. Tighten loose edges if necessary. Use a tapping block to close small spaces. Adjust planks before sealing the edges. Small gaps can cause moisture issues.
Fixing them ensures a water-resistant seal. Check alignment for a seamless look. Proper adjustments enhance durability. A secure floor prevents future problems.
Seal the Edges
Sealing the edges prevents moisture from getting underneath. Use a waterproof sealant around the perimeter. This helps protect against spills and humidity. Focus on areas near walls and doors.
A proper seal extends the life of your flooring. Follow the instructions for best results. Let the sealant dry completely. Skipping this step may lead to damage. A sealed floor stays in good condition longer.
Add Finishing Touches
Once installed, add baseboards or trim for a polished look. This hides expansion gaps along the walls. Use finishing nails or adhesive to secure trims. Matching trim creates a seamless appearance.
Clean any excess glue before it dries. A neat finish enhances the room's design. Take time to perfect the details. Proper finishing makes the upgrade complete.
Maintain Your New Flooring
Regular maintenance keeps your flooring looking great. Sweep daily to remove dust and dirt. Use a damp mop for deeper cleaning. Avoid harsh chemicals that may damage the surface.
Place mats at entryways to reduce wear. Wipe spills immediately to prevent stains. Protect the floor from heavy furniture. Use felt pads under chair legs. Simple care extends the floor's lifespan.
Consider Waterproof Features
Waterproof vinyl plank flooring is resistant to moisture. It works well in areas prone to spills. Bathrooms, kitchens, and basements benefit from this feature. Unlike wood, it does not warp when wet.
A quality option like Mannington waterproof vinyl plank offers durability. Waterproof flooring is a smart choice for busy homes. It provides both beauty and function.
Choosing waterproof options prevents future problems. A water-resistant floor is easy to manage.
Enjoy the Benefits of Your Upgrade
After installation, enjoy the many benefits of your new floor. Waterproof vinyl plank flooring is durable and stylish. It adds value to your home. The surface is easy to clean and maintain. It resists scratches and stains.
This flooring works well in high-traffic areas. It is also comfortable underfoot. A well-installed floor enhances your space. Your upgrade is a worthwhile investment.
Upgrading to waterproof vinyl plank flooring is a smart choice. It improves both the look and function of your home. With the right preparation and tools, installation is simple.
Choosing the right style ensures a beautiful result. Proper maintenance keeps it in top condition. A well-installed floor lasts for years.
Waterproof flooring is practical and stylish. Following these steps makes the upgrade easy. Enjoy your new floors with confidence.
To read more topics, visit our blog. We do have more!

- Advertisement - Continue Reading Below -
- Advertisement - Continue Reading Below -