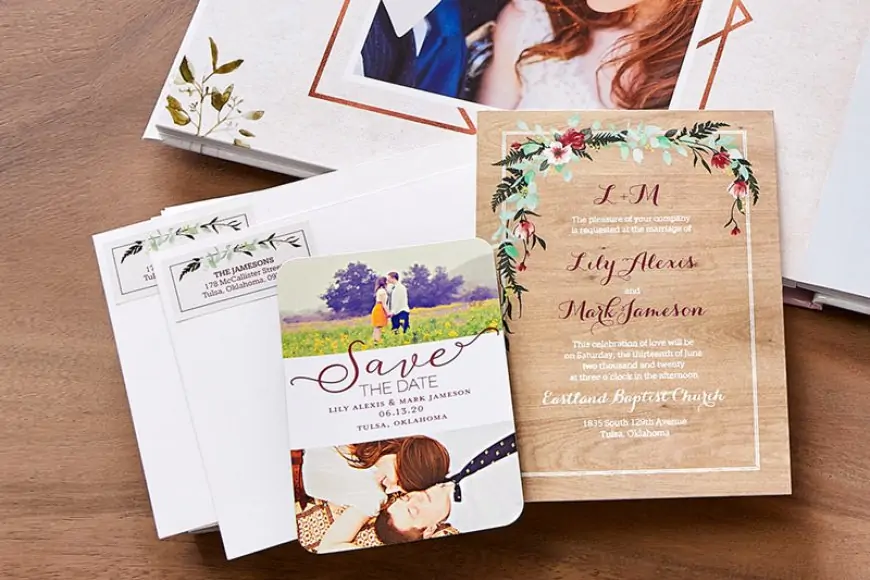
When To Design Your Wedding Invitations
All the design elements start to fall into place after you choose your venue. Since most locations recommend booking at least a year in advance, you can really begin brainstorming your wedding card design the moment this is locked into place. Give yourself plenty of time to perfect your wedding stationery—including things like RSVP cards, bridal shower invitations, and wedding thank you cards—by designing your suite about eight to 12 months before the big day. Though you don’t need to order and send your invitations until the two- or three-month mark, allow extra time to make custom invitations that fit your style. It’s also important to keep a few things in mind when timing out your custom invitations:
- For a destination wedding, send save the dates and invitations earlier than traditional locations.
- If you plan to match your save the dates and the rest of your wedding stationery, be sure to design these at the same time in the eight to 12-month window.
- For photo cards, wait until your photographer has delivered your engagement photos.
- Create a wedding website before finalizing your invitations so you can include the URL and specific details there.
- When you’re waiting for your invitations, design customized address labels and personalized postage stamps to go with your suite.
How To Design Your Own Wedding Invitations
You don’t have to be a graphic designer to create custom invitations, but it does help to use some of their tools to get started. Shutterfly allows you to upload your design or edit pre-designed wedding invitation templates with ideas that may inspire creativity. Whichever way you choose to go, you may already have a general idea of what you’re hoping to create. Our online tools help you see your ideas in reality. Each card design breaks down to a few main elements: theme, style, size, wording, balance, and materials. Explore our guide for designing your own wedding invitation suite that will truly wow your guests.Quantity
Stationery is traditionally sold in rounded increments such as 20, 50, or 75. Use this to your advantage by ordering a few extra invitations just in case. Errors can occur in the mail or when building your guest list. Determine the number of custom invitations you need by counting how many households you’re sending out information to, not necessarily the number of people. If you accidentally leave someone off your list, you’ll have extras to send out in a second mailing. Pair your invites with lined envelopes as well as personalized stamps and address labels. Streamline your wedding planning by ordering the rest of your stationery suite like RSVP cards, date cards, rehearsal dinner enclosure cards, response cards, and any additional note cards in one order. A few tips:
- Always over-order to be safe.
- Determine your invitation number by how many addresses you have on your list. Couples and families can be grouped together.
- Leftover invitations are also great for wedding photo books.
Theme
Even the most classic weddings have a theme, even if that theme is something simple like the season or type of venue. Pull from the small details that make your wedding design unique to begin laying out your invitations. Incorporate your colors, patterns, and fonts that reflect the ambiance of your big day—keep these in mind as well once you start planning out other elements, like wedding programs and reception menus. Not only will this excite your guests about your big celebration, but it also keys them into how to dress and prepare for your event. If you had an engagement party, think about how you can carry over elements of the engagement party invitations into your wedding stationery suite. Begin by considering your basic wedding theme. Is it traditional? Whimsical? Bohemian? Sort through invitation samples to get ideas. Once you land on a theme, stick to two or three colors on your invitations to keep it clean and easy to read. Balance paler tones with contrasting font color and hint at your theme without giving away your whole design by adding small details like floral or star border. Photo cards are an easy way to reflect the theme of your wedding as well.
Style
Style refers to the specific design choices made on your wedding cards. Font style, size, and placement should blend with the surrounding design. How do you want your overall design to look? Consider your theme for answers. If you’re going with a classic wedding theme, keep your design simplistic with two colors and minimal flourish. Going with a springtime garden theme? Fill the border or background of your invitation with soft flowers or watercolors. A few tips:- Legibility is key. Keep your font bold, clear, and avoid overcrowding.
- Start from the outside in. Choose a base color, add a border, place your font and then add any extra embellishment.
- Consider matching your invite style with the envelopes or other inserts.
- Wedding cards come in all shapes and sizes, including folding or notecards. Take all the details listed below into account when finalizing your card style.
Size
Today’s most standard wedding invitation size is 5×7 inches. This size card allows plenty of room to include basic details, your wedding website, and all your design embellishments. Play with size and card structure based on how you want your guests to interact with their stationery. Choose from half-fold or accordion cards that open to more your information and allow more design space. For traditional cards, play with the cut of the wedding card’s border as well. For a straightforward mailing process, avoid non-traditional wedding invitation sizes that require additional postage. We also recommend keeping your design on one side of the card for easy reading. Once you set your design in place, add unique qualities to your card with cut borders or thick cardstock. Thicker cardstock is best for printing vibrant photo cards, text, and colorful design while giving the invitation a heavy, professional feel.
Wording
What should you say in DIY wedding invitations? With so little space, it can be tricky to pick and choose what to include and what to save for your website. In general, most wedding invitation wording includes the hosts’ names, the wedding announcement, the location and timing details, RSVP date, and where to find more information. A few tips:- Create a short link for your wedding website if it’s tricky to fit neatly on your invite.
- Consider writing out your wedding date and time instead of using numbers.
- Set the tone of your wedding day based on the formality of the words.
- Add embellishments within your text by using delicate fonts and gold or silver-leaf typesettings.
When To Send Your Wedding Invitations
Wedding invites traditionally go out in the mail between six and eight weeks before your wedding day. This gives your guests enough time to RSVP, book their hotel rooms, and arrange travel. They should already have the date on their radar after receiving your save the dates, which went out several months prior depending on your wedding location. If you’re planning a destination, send out your save the dates and invitations on the earlier side so family and friends can coordinate. Check out our wedding planning checklist for more tips. When you’re ready to send out your invitations, make a note in a spreadsheet that you double-checked each name made it into the mail. Keep your eye out for RSVPs or questions after about a week and be ready to send out any invites returned in the mail due to address errors or transit issues. Leaving enough time to process your RSVPs allows you to move forward with all your additional stationery like table place cards and menu selections as well as keep your wedding planner in the loop.
Sending out your custom wedding invitations kicks the final phase of wedding planning into motion. With just a few weeks until the big day, a finalized guest list is the major detail that makes your dream design a reality. When you take your time to design your own wedding invitations, you get the chance to slow down to create a personalized keepsake you’ll cherish for the rest of your lives.


